


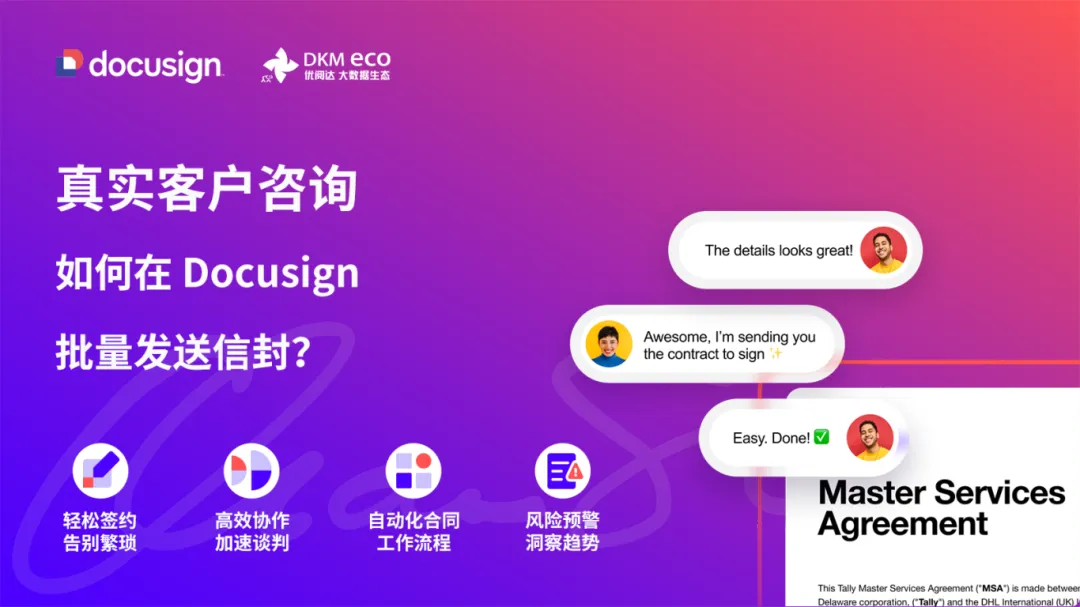
Real Customer Inquiry | How to Bulk Send Envelopes in DocuSign?

In the expansion of enterprise cross-border operations, frequently signing contracts with overseas partners is a common occurrence. However, the traditional method of manually sending contracts in bulk is not only time-consuming and inefficient but also prone to human error, leading to information inaccuracies. Additionally, factors like time zone differences and geographical distance can further delay the signing process.
As a global leader in electronic signatures and contract management, DocuSign offers a powerful bulk send feature that effectively streamlines complex processes and significantly improves contract delivery efficiency. It serves as a valuable tool for reducing costs and increasing efficiency in cross-border business operations.
This article focuses on DocuSign’s bulk send feature, providing a comprehensive analysis covering the operational process, practical tips, and key management points. It aims to help businesses quickly master this efficient tool, break through contract signing bottlenecks, and seize opportunities in a rapidly changing international market.
Step-by-Step Guide
01. Enable Bulk Send Feature
First, locate and click the “Use” button in the system interface, then click the “Bulk Send” link to access the entry point for DocuSign’s bulk send feature.
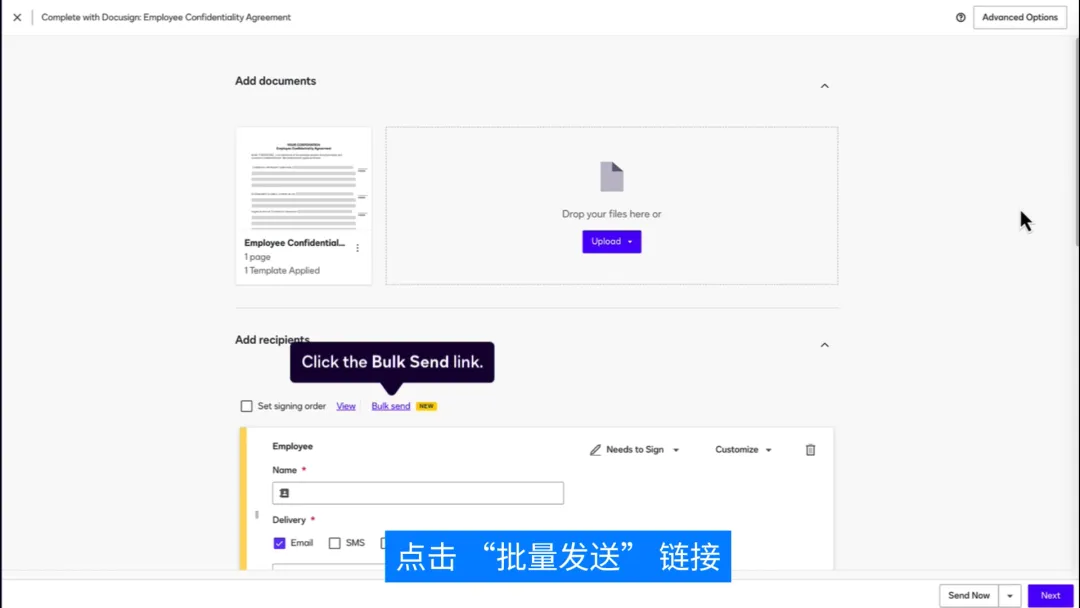
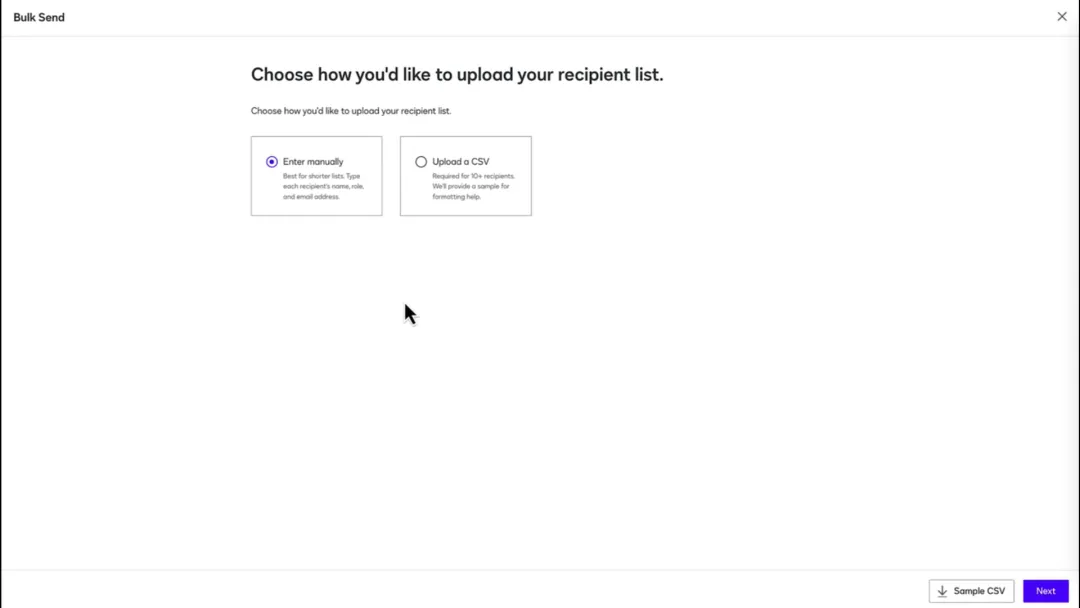
02. Choose How to Add Recipients
Choose the method to add recipients based on your needs:
- Manual Entry: If the number of recipients is small (fewer than 10) and no pre-filled fields are needed, you can choose “Manual Entry” and input each recipient’s information one by one.
- Upload CSV File: When dealing with a large list of recipients or pre-filled field requirements, “Upload CSV File” is more efficient. If you’re unsure how to create the CSV file, click “Sample CSV” to get a reference template. The template’s headers exactly match the recipient fields and data tags in your contract template, with each row representing data for one envelope.
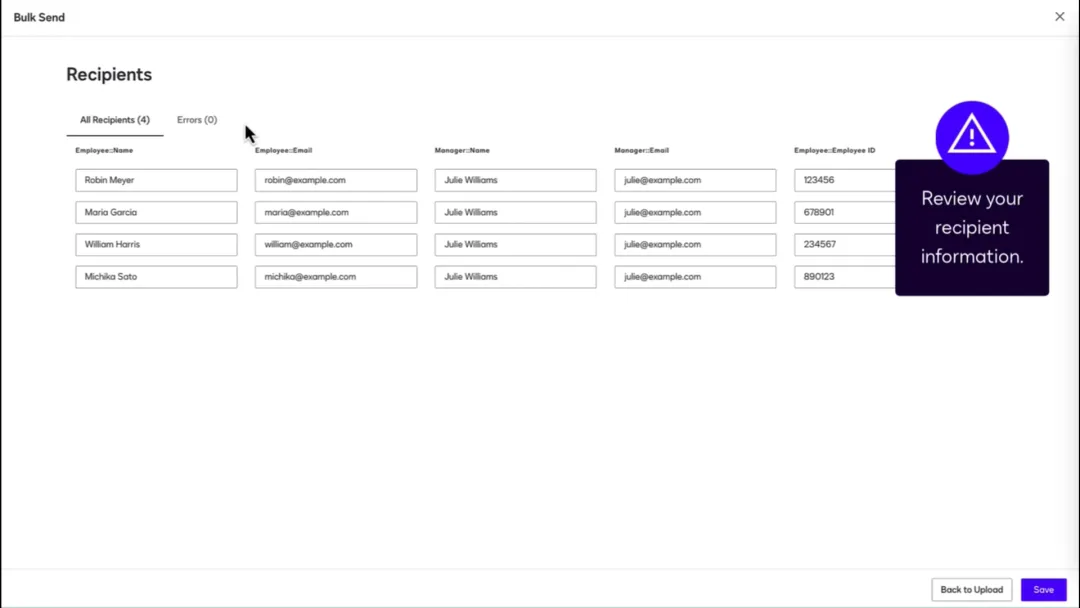
03. Upload and Verify Recipient Information
After saving your CSV file, click “Next” to upload it and add the prepared CSV file to the system. Once uploaded, carefully review the recipient information to ensure accuracy and avoid delays caused by incorrect data.
04. Personalization and Additional Settings
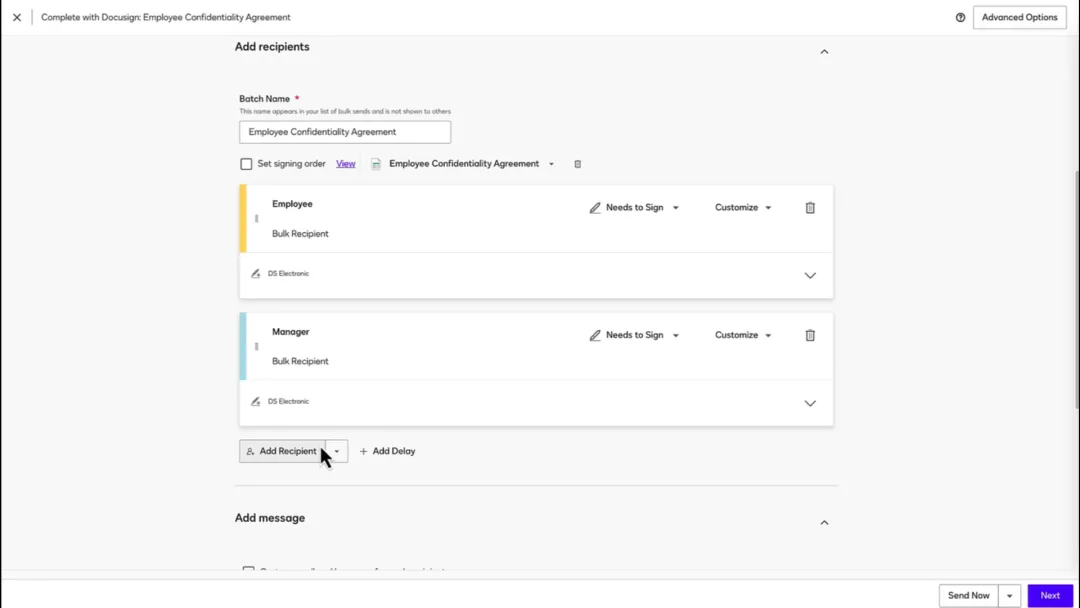
- Receive Copies and Preview Signing: As the sender, you will automatically receive copies of all completed envelopes. To preview or participate in the signing before completion, click “Add Recipient” and include yourself in the recipient list.
- Field Assignment: Assign the appropriate fields to newly added recipients to ensure that the contract content aligns correctly with each recipient.
- Adjust Signing Order: Based on business needs, enable and adjust the signing order to ensure the process aligns with agreements among all parties.
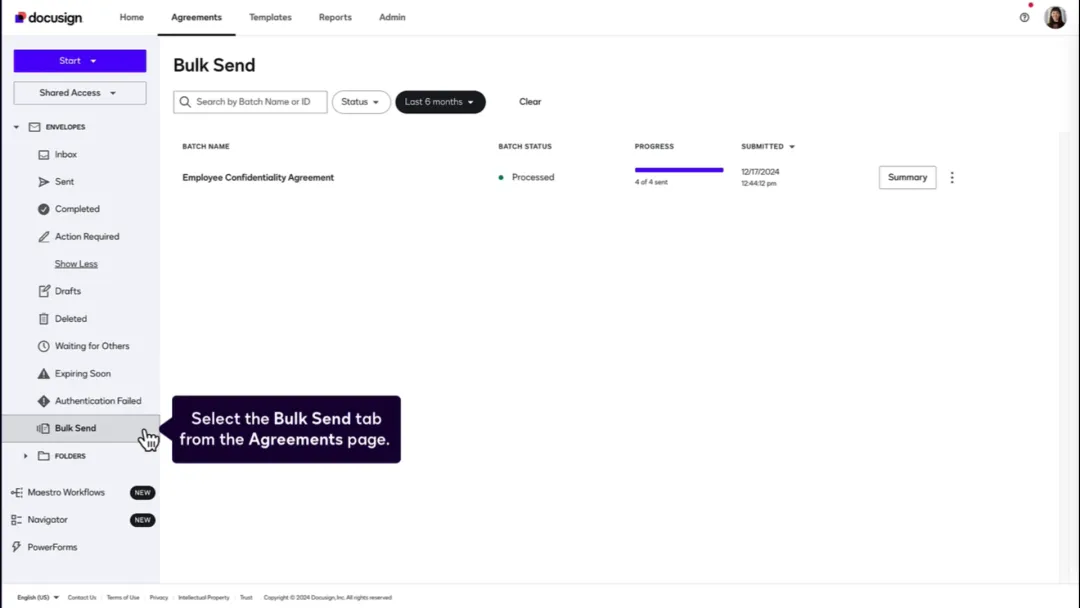
05. Manage Bulk Envelopes
After sending the contracts, navigate to the “Agreements” page and select the “Bulk Send” tab to manage your bulk envelopes in one place. Here, you can monitor envelope statuses in real time, track contract signing progress, take action on envelopes based on their status, and edit or share content as needed for streamlined contract management.
Bulk Send Feature – Accelerating Cross-Border Contract Signing
As outlined above, DocuSign’s bulk send feature offers a flexible and diverse operation model that fits contract delivery needs of all scales. Whether manually entering a few recipients or using a CSV file to manage large data sets, the process is efficient and accurate. Additionally, its personalization and centralized management functions ensure a smooth and controlled signing workflow.
By leveraging DocuSign’s bulk send feature, enterprises can significantly shorten contract delivery times, reduce human errors, optimize cross-border business workflows, and enhance overall operational efficiency—injecting momentum into international collaboration.